- Why Skipping Air Filter Replacements Could Be Costing You More Than You Think
- Allergy Season Is Coming: How a Fresh Air Filter Can Help You Breathe Happy This Spring
- Love Your Lungs: Why Clean Air Is the Gift Your Home Deserves
- Racing Into Cleaner Air: How FilterTime Got Its Start on the Track
- Winter-Proof Your HVAC System: What Every Homeowner Should Be Doing Right Now
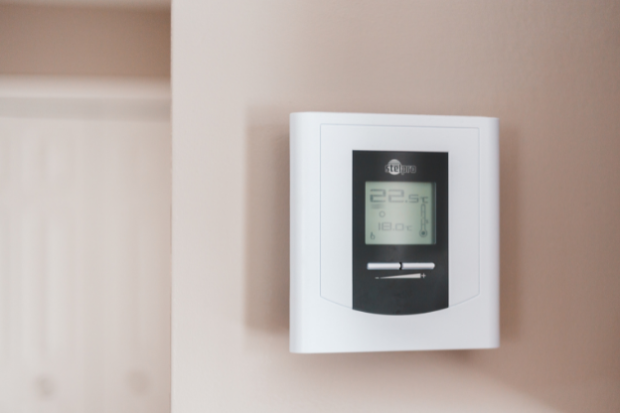
If you make the smart decision to replace a thermostat, you can lower your utility bills, ensure more comfortable temperatures for you and your family, and even increase your home value. Fortunately, it only takes an hour or two to install a thermostat. Best of all, you may do so on your own without any fancy tools or equipment. Here’s everything you need to know about thermostat installation.
What You’ll Need
First and foremost, gather all the tools you’ll need. Chances are you already have most of them at home and won’t have to buy anything extra. Find a screwdriver and level. Since the installation will require you to label the wires, don't forget masking tape and a permanent market.
What to Do
As long as you follow these steps, your new thermostat should be good to go in no time.
Turn Off the Power
Before you do anything, shut the power off to your existing thermostat. To do so, you’ll want to find the circuit breaker that’s intended for your heating and air conditioning system at the main service panel. Hopefully, it’s clearly labeled.
Remove the Old Thermostat
Once you turn off the breaker, remove the cover plate from the old thermostat. It should easily pop off after you apply a bit of pressure. Then, use a screwdriver to take the body of the old thermostat from the wall.
Label the Wires
While labeling the wires isn’t required, it will make your life so much easier. Write on a small piece of masking tape and tape it to each wire. You can keep things simple and jot down a single letter that explains where to attach each specific wire to the old thermostat.
Disconnect the Wires
After your wires are labeled, disconnect them from the old thermostat. Be extra careful during this step. If the wires do disappear behind the wall, it will be time-consuming and tedious to sort them out. You can tape them to the wall or wrap them around a pen or pencil.
Install a C-Wire If Necessary
Smart thermostats come with common wires or C-wires, which offer continuous flow to the thermostat but don’t turn your other appliances on or off. If you’re replacing the smart thermostat with another one, you can skip this step. However, if you’re upgrading to a smart thermostat, you’ll need to find the C-wire or install a new one. You can always call an electrician to help you with the installation.
Install the New Base and Wire
Next, install the base and wire of the new thermostat. To do so, loosen the mounting screws and remove the existing base. Then, separate the front of the new thermostat from the base. Thread the low-voltage wires through the opening of the new base. Use a level to ensure your thermostat is aligned correctly.
Use the screws that came with the thermostat to mount the base on the wall. Connect the low-voltage wires to the right screw terminals on the new base. Be sure to look at the new thermostat’s manual if your connections don’t match. Don’t forget to tighten the connections and install the batteries in the body.
Mount Thermostat and Turn On Power
Push the excess wires back into the wall opening and plug the hole with a fire-resistant material to mount the base. Then, use screws to mount the control unit to the base. Turn the power back on and press the reset button. Last but not least, program the thermostat using the directions in the owner’s manual.
Change Your Air Filters Without the Hassle
While changing air filters every few months may not be as installing a brand new thermostat, doing so is important. You can count on air filters to capture the pollutants and particles, pushing clean, fresh air back into your living space. With FilterTime’s air filter subscription service, you can keep the air in your home in optimal shape, year round.
Once you subscribe, the right air filters will get shipped to your doorstep automatically so you’ll know exactly when to change them. Since there are no shipping charges, contracts, or hidden fees, you have nothing to lose. Get started today!
Written by: Anna Baluch

« Back to News


