- Why Skipping Air Filter Replacements Could Be Costing You More Than You Think
- Allergy Season Is Coming: How a Fresh Air Filter Can Help You Breathe Happy This Spring
- Love Your Lungs: Why Clean Air Is the Gift Your Home Deserves
- Racing Into Cleaner Air: How FilterTime Got Its Start on the Track
- Winter-Proof Your HVAC System: What Every Homeowner Should Be Doing Right Now
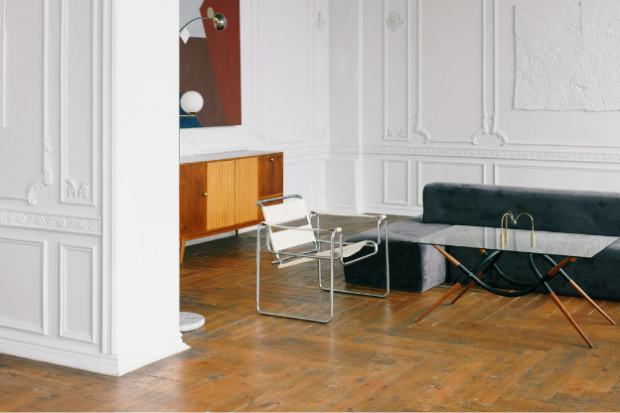
Wainscoting is a great way to add style and sophistication to your home. It’s essentially a decorative paneling on the lower portion of a wall. Oftentimes, wainscoting is applied to dining rooms, living rooms, and home offices.
You may be surprised to learn that you don’t have to hire a pro to install wainscoting. In fact, you can complete this simple DIY project in just one day. It’s one of those easy home upgrades that will make your home look like a million bucks. Keep reading to learn how to install wainscotting wall paneling.
Step 1: Gather the Appropriate Tools
Before you begin the installation process, make sure you have the following tools on hand:
- Jig saw
- Circular saw
- Hammer
- Measuring tape
- Pencil
- Level
- Stud finder
- Pry bar
- Screwdriver
- Circuit tester
- Goggles
- Hearing protection
Step 2: Purchase the Right Materials
In addition to certain tools, you’ll need these materials which can be found at a local home improvement store:
- Wainscoting panels
- Moulding
- Construction adhesive
- Paneling nails
Step 3: Prep the Space
First, carefully remove baseboards from the walls. Then, remove any outlet covers or light switch covers in the area you plan to apply the wainscoting. Also, repair or patch any holes in the upper part of the wall.
Step 4: Measure the Space
Find out the total linear square footage of the room and divide that number by the width of the panels in feet. If you come up with a fraction, round up to the next whole number. This will tell you the number of panels you need.
Step 5: Set the First Panel and Secure the Wood Panel
Remember that wainscoting is typically installed from left to right. Begin in one corner of the room with a full panel. Apply construction adhesive to the back of it and set it in place. Make sure the top of the panel is flesh with the line on the wall and about 1/16 inch from the adjacent wall. Next, hold the wood panel in place and use paneling nails to secure it.
Step 6: Install the Second Panel and Continue to Install Panels
Install the second panel about 1/16 inch from the first panel and flush with the level line. Continue to install the panels until you reach the next corner.
Step 7: Cut the Corner Panels
Since you probably won’t have room to install a full panel at the corner, you’ll need to cut a panel. Measure from the top of the last full panel to the wall and subtract 1/8 inch. Then, measure from the bottom of the last full panel and subtract 1/8 inch. Lastly, transfer your measurements to the back of the panel you need to cut and cut it accordingly.
Step 8: Install the Rest of the Panels, Moulding, and Wall Plates
Continue to install the remaining wainscotting. Once all of the panels are in place, install the baseboard and chair rail moulding plus the outlet covers and wall plates.
Change Your Air Filters Without the Hassle
While changing air filters every few months may not be as exciting as installing wainscoting wall paneling, doing so is important. You can count on air filters to capture the pollutants and particles, pushing clean, fresh air back into your living space. With FilterTime’s air filter subscription service, you can keep the air in your home in optimal shape, year round.
Once you subscribe, the right air filters will get shipped to your doorstep automatically so you’ll know exactly when to change them. Since there are no shipping charges, contracts, or hidden fees, you have nothing to lose. Get started today!
Written by: Anna Baluch

« Back to News


